Articles,
Tips & How-tosThere's never an end to a gardener's
learning curve! 100's of articles & tips here at
YRGardening.ca, on LOCAL gardening conditions, to browse by date or by
topic, to help you along yours.
Gardening
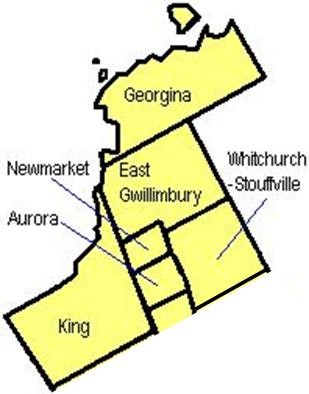
in the northern York Region, zone 4 climate area. We have challenges!
North of around Hwy#7, we're on the colder side of zone 4 / 5, (zone 5b on
the Canadian zone map and zone 4 on the USDA map)
and we have more challenges than our GTA colleagues to the
south. Our weather here in the northern part of York
Region is more influenced by Lake Simcoe than it is Lake Ontario,
unlike conditions in say Markham or Richmond Hill.
(Where I live in Queensville, it's kinda crazy how the two
weather systems collide sometimes! I've often driven
through torrential rain in Aurora to find clear sky and not a
drop on the ground once I'm home! North of Green Lane in
particular it seems the Lake Simcoe influence becomes dominant.)
We have fewer frost free days, with extreme temp swings at the start
and end of Scroll the
articles below in date order for when-to-do what
guidance, but you can also look
to the index at left to browse by
topic.
Cheers! Evelynwinter, that
frustrates efforts to grow unusual plants and keeps us guessing on
the timing of what-to-do-when.
I
used to garden in north Toronto and I've experienced the big
difference up here first hand! Forget most of those
lovely cut-leaf Japanese Maples or any of the flowering Dogwood
trees (other than our native Cornus alternifolia which I
thankfully love!). Flower buds are often
zapped by just a day or two of our area's last frost date that
regularly happens in late May. No matter! There's still
plenty of gorgeous plants to choose from! Evelyn Wolf
All
of the articles here reflect gardening in the relatively cold-ish
climate of northern York Region.
(.YRgardening.ca is a
brand new web site launched April 2019. If
you'd like me to post an article on a particular topic,email anytime!
Go to the Site
Map page to help you find the topics you're looking for to
help you in your Newmarket area garden.
Evelyn
from
April 5th, 2007 Is Mother
Nature entering Menopause?!On the crazy
freeze/thaw of early Spring. (An article I wrote originally for the local Era Banner.)
Mother Nature's mood swings this spring are
extreme! Perennial plants NEED a cold winter
to stay safe during their dormant period. We had record cold
temperatures for February and, so far, April has been well
below normal. What's the problem then? The record WARM
temperatures we had in January and March!
In central Ontario our early spring weather is usually erratic, but
2007 saw temperatureextremes more severe than any in my gardening
memory. A warm spell in January lasted long enough to cause
alarm among horticultural experts with reports coming in from all
over southern Ontario of buds beginning to swell on trees and shrubs
and even a few spring bulbs popping. When winter finally
arrived in mid January we quickly dipped down to normal temperatures
and had good snow cover, and I thought we just may have nipped
disaster in the bud. (excuse the pun I couldn't
resist!). The February thaw we always experience
just plain didn't happen. Instead Mother Nature kept all her
warm thoughts bundled up and concentrated on a late March warming
that, again, lasted much longer than usual, sending the signal to
plants that spring had firmly arrived. Wouldn't it have been
wonderful had this been true!
But alas, it was too good to be true as it is also routine for us to
experience many last blasts of winter in April. But our plants
didn't know this so in the sunshine and +10ish temperatures of late
March flower buds on trees and shrubs broke dormancy and perennials
started showing themselves above ground.
There's no doubt we'll see the effects of these extremes on many
early blooming shrubs such as magnolias, forsythias, elderberry,
and rhododendrons, with lots of flower bud damage. It
may have been a deadly situation for some roses, viburnums and newly
planted shrubs. Even a few of the late spring bloomers such as
crabapples, lilacs, and some fruit trees may have experienced some
flower bud damage.
It isn't just gardeners that may be affected by this unhappy
situation though. Flower bud damage on fruit trees may show up
in the price we'll pay for fresh fruit later this summer since
reduced flowering, of course, leads to reduced crop yields.
Depending on cultural practices (winter mulch protection, or not),
the strawberry and other small berry harvests may also be
affected. The extent of the damage depends on plant species
and the stage of plant development just before the cold April
temperatures hit with a bang. Let's cross our fingers!
Not much else to be done.
In my Newmarket garden, thankfully no shrubs had yet unfolded their
leaves and flowering perennials, for the most part, had poked their
noses up only fractions of an inch, but sunny exposures in gardens
to the south may have prematurely warmed enough for leaf damage to
also occur.
Overall your spring plants may behave poorly this year with dead
flower buds and perhaps freeze burned foliage, but don't panic
and rush out for any plant-problem-fix-its. The culprit is
simply Mother Nature in a particularly bad mood this spring
and your plants will recover and leaf out again. You may need
to wait until next year to see a good full blooming on some shrubs
again though. If any of your plants have been severely
affected, extra TLC this summer during any drought spells and
perhaps a few shovel fulls of compost will help them recover.
I'm not normally one for burlaping or otherwise protecting shrubs
during the vulnerable period of March & April, but this
cross-my-fingers attitude will likely cost me dearly this
year! In the rush to plant up my new garden last fall, plants
were put into the ground without the appropriate care and I didn't
get a compost mulch on until just recently. This
test-the-limits approach teaches me a lot about plant adaptation and
survival techniques that serve me well in the gardening classes I
teach, but boy - this year my gardening lesson probably bears
a hefty price tag! I'll see just how many plants succumbed to
this extreme see / saw winter in a few weeks, but with the heaved
root balls and browned buds all over my new garden, it certainly
doesn't look promising. Check in with me later this month when
I'll yet again pass on words of wisdom learned from hard experience!
from May 13th, 2007 Steps to Creative Planting Design.
All too often, plant choices are dictated by the rush of excitement
in the opening days of the season, during your first garden center
visit. (I'm certainly as guilty as any when it comes to the
inability to restrain myself from buying far too much, without any
idea of how they'll fit into my garden's design.) Once
you're back home though, some thorough research on the plants you've
purchased is the first step to knowing where to plant them to take
best advantage of whatever design merits they have.
Designing a mixed perennial and shrub garden bed is easier to feel
confident about if you think of it not as a collection of
individual beautiful plants, but as a collection of vignettes -
smaller groupings of plants that compliment eachother through
contrast or harmony of shape or colour, to create a single picture
within the larger canvas of your garden bed. Each
vignette should have plants with different flowering times and
seasons of interest and also have as much contrast in foliage
texture or colour as possible. For each flower favourite try
to find a foliage companion with a different bloom time.
Here's one classic example.
~ Early tulips
(late April), late tulips (May), with forget-me-nots (late May) as
an underplanting. A white edged Hosta and dark ferny leaved
Astilbe close by will be only inches out of the ground but will be
ready to take over the space with contrasting foliage for June
when the forget-me-nots can be removed and tulips cut back. ~ Hosta and Astilbe will be your July bloom while
their foliage phase alone makes a lovely duo in the
meantime. A white flowered Japanese Iris added to this group
will bloom in June and echo the white in the Hosta leaves and also
add another element to the foliage contrast. ~ By August all flowering is finished in this group,
but the foliage contrast alone is keeping this spot looking
good. A clump of Purple coneflower added as a backdrop will
offer August and September bloom and some height. ...and
finally, the Coneflower seedheads and the foliage of the Japanese
Iris will stand tall all winter through the snow, for winter
interest.
In this one tightly planted group you have a miniature garden
within a garden, looking good at all times.
Surrounding it could be a low groundcover plant like Dianthus to
help the vignette pop. You're aiming at creating plant
groupings that stand out.
To create a harmonious larger picture, the garden bed itself, a few
all season vignettes like these should be repeated through the
bed. Each group becomes a focal point that gives the illusion
of the garden being larger, but the eye still moves comfortably from
group to group to take the whole picture in.
Developing an eye for
planting design comes step-by-step and grows with your expanding
knowledge of the huge assortment of plants available today. Train
yourself to look at a plant's form (mound, upright, fountaining) and
foliage texture (ferny, fuzzy, bold, strappy), not just its flower
colour. When you get dressed in the morning,
you choose the main item you want to wear and then choose either a
contrasting or matching item to wear with it. Then
perhaps a bit of jewelry in scale with the outfit completes the
picture. In a garden you're using the same sense of matching,
contrasting, decorating, etc. to design individual pictures that
come together to create the whole. Make notes as you go
and think of mistakes as learning opportunities, then move on. There
is no right and wrong to art, and garden design is art. Like
all art, it takes practice, keen observation, and learning more
about your tools - the plants.
Happy planting! Evelyn
a
short article written for my "Dirty Knees" newsletter early
August 2009 after a very rainy summer. The 2018
season had the same problem and I lost many of my plants to crown
rot again! Evelyn
Too Much of a Good Thing...!
"Remember summer 2007 when the heat and drought just went on and
on? We were all convinced that it was a sign of things to come
in the era of climate change.
Well...uh...where's the drought? Can I have some drought
please? PLEASE!
We have had so much rain, combined with a lack of any
intense sun and heat this summer, that many plants just flopped
about as though they were drunk. Many drought loving
plants suffered rot spots and mildewy leaves and a few just outright
died from crown rot. Plants were loving the wet cool spring as
they were in their green growth phase and were able to use up all
the water that fell, but by summer they needed some heat and
sunshine! To say the blooming this year was lackluster as
a result, is an understatement.
Normally sturdy, upright and
tall, this new salmon Echinacea hybrid I was so looking forward to
being really great this year in my 2nd year garden, is flopping near
the ground instead, with many fewer blooms than it would normally
have. Overall, it isn't so much the excess water that's
the main problem, but the inherent lack of sunshine and heat that
comes with lots of rain days that is the double whammy when there's
a summer with just too much rain.
There's not much to be done about this problem. At least when
climate change brings us dry heat, we have the option of planting
lots of drought tolerant things, as many of our standard garden
plants are, but when there's too much
water, all we can do is dream of next year."
from
Nov. 9th, 2003 - an article originally written for my "Dirty
Knees" newsletter I used to email.
Chop Leaves Instead of Bagging Them Up ! Q. I'd like to start using all the
leaves we have in our yard at this time of year in my garden, but
I've been told that they can rot and create a big mess. Can I
use them directly on my garden beds? A. That's absolute gold falling from your
trees! Gardener's gold! Yes, you can, and
should, use your fallen leaves in your garden for many
reasons. All you need to do to prevent any rot problems is
chop them up a bit to increase air flow and then make sure it isn't
piled on top of your plants, but around them - just like you'd
handle any mulch.
The fallen leaves of deciduous trees are a major part of Mother
Nature's intricate, self sustaining system. Through this
annual cycle of shedding leaves to rest and renew, soil is given an
annual boost of organic matter to keep it alive and able to feed and
sustain plant life. Somehow though, we have come to think of
autumn leaves as garden "waste" that needs to be cleaned
away.
Let's look more closely at this annual gardening ritual.
Each autumn we put out $25.00 or more to buy yard waste bags
to cope with the task of bagging leaves. Special gadgets to
help keep the bags open while you rake and stuff can also be bought
for a few more dollars. We then haul dozens of these full bags
to sit at the curb for a couple of weeks (a real eye-sore) until
yard "waste" pick up day. On this day, your tax dollars
go towards (Once
you experience the benefits of improving your soil with chopped
leaves, you'll turn into one of those people who drive around at
night in autumn to scoop up everyone else's leaf bags sitting by
the curb in fall to add to your pile!) paying
someone to pick up this "waste". They then take this
precious cargo to a compost yard where it is chopped and piled to
naturally decompose. Then, next spring when you're working in
your garden and realize you need some compost to boost your soil,
you drive to the same compost yard, where they'll happily sell your
leaves back to you for $6.00 or more per bag. Personally,
I'd rather spend all this money on new plants!
Instead of bagging your leaves this fall, put them right where
they were intended to go - in your garden to feed the soil,
which will in turn feed your plants. All you need to do is
speed along the decomposition process a bit by chopping the leaves
to make an attractive and highly nutritious mulch. When
most of the leaves have fallen rake them into a huge pile in the
middle of your yard and go at it with your lawn mower. Move
along in circles working in from the outside edges, aiming the exit
hole of your lawn mower to the inside of the pile so that the chopped leaves remain in a pile
and are chopped ever finer with each pass.
Most people think that they have too many leaves for their garden to
consume, but you'll be amazed at the small mound that remains when
you're done. From personal experience I know that a pile of 40
or more bags is reduced to just a small pile that would fill maybe 2
or 3 bags. Spread the resulting rich and
attractive material in a 2" blanket over your soil and around your
plants. If you have enough, also spread a very fine
layer over your lawn. This is all you need to do
for the entire year to keep your soil healthy and plants well fed.
Other than the cost of a tank of gas for the lawn mower, this
gardener's gold didn't cost you a cent!
Making sure your garden soil always has a fresh supply of organic
material is perhaps THE most important thing you can do in a garden
to ensure long term success. The organic material
portion of the triple-mix your garden started with a few years ago
is consumed by now. Without an annual replenishment of organic
matter, there is no food for the worms or the millions of other
smaller micro-organisms that are an essential part of the amazing
underground chain reaction that is a soil's own ecosystem - the
living earth. Plant life feeds on the
nutrients that result from all of this busy micro-organism
underground activity. Think of the microscopic forms
of animal and insect life that live underground as your much
beloved pets and garden allies that help your garden
thrive. Just toss them this annual meal of chopped leaves and
they will stick around and pay you back handsomely with healthy
plants and plenty of blooms.
from
April 1st 2003 Correct Planting of New Trees &
Shrubs. Q. My friend and I
both bought a cutleaf Japanese maple last summer, but hers is doing
fine while mine seems to be struggling. They were both similarly
healthy when purchased.
A. It isn't easy to diagnose
plant problems from a distance of course, but the difference between
the current state of health of your shrub, as opposed your friend's,
is probably the result of improper original planting.
I'll assume you watered well at planting time, but watering after
planting often won't penetrate the tightly congested root ball of a
new plant that has spent the first few years of life in a pot.
Even though nursery grown plants are healthy and treated well, life
in the confined space of a pot is not a happy one, especially for
woody plants. Roots on a sizeable container grown plant can
become so congested as they circle around the Even "drought tolerant" plants need lots of
watering help for the first 2-3 months after planting. Until
they regrow the fine root hairs that were damaged at planting
time, they're extremely vulnerable to collapse since they can't
replace leaf moisture fast enough. Same is true for even dry
loving plants. For just a bit of time, they need your
help. (read "This Year We'll Be Ready" on the Drought
Tolerant Gardening page. link to)
Evelyninside of the pot that they can become impenetrable -
even by water. If these roots are not untangled at
planting time to let soil, water and air reach all of the roots,
only the outer roots will ever be in contact with water and the
plant will struggle for life until it can establish a whole new
network of roots outside of this congested ball. They can
suffer a lot of damage during this period and sometimes will not
make it through. (This sounds like what your young tree might
be going through now.)
If your tree or shrub does makes it through this phase, a different
problem can emerge much later in the plant's life if root that
circled the inside of the pot weren't untangled at
planting. In a worst case scenario, these roots will grow in
girth to literally strangle the tree or shrub's trunk base,
eventually cutting off the flow of water and nutrients. It
isn't unusual for these "girdling roots" to be the cause of poor
health or death of long established trees.
(To prevent this problem in a mature plant, at year 5 or 6ish,
when the tree has established a good new root system, cut any roots
that appear to circle the trunk at the base. Scratch 5 or 6
inches down around the trunk and hunt for any offenders. Even
if you find a large circling root, the stress caused by cutting it
will set the plant back a bit, but it will recover. It won't
be able to recover from a girdling root that's allowed to stay and
strangle the tree in the future though.)
The correct method for planting all new plants, especially woody
plants is as follows. ~ Prepare a hole twice the diameter of the
pot, but no deeper. ~ Fill the hole with water and let it drain
to thoroughly soak the soil. ~ Remove the plant from its pot (in
the shade!!!) and put it in a bucket of water to soak
and loosen the root ball. If the root ball is very congested,
the jet spray of your watering hose will help force a break in the
armor. ~ Separate and untangle larger roots,
especially any that are circling, even if you have to cut them to do so. Dunk
them in the water again to moisten and loosen them further. ~ Spread roots out in the hole as much as
you can without causing damage, positioning the crown at the correct
level (no deeper than it was in the pot) then add soil,
firming as you go. ~ Leave a bit of a trench around the base
to allow water to pool and soak through the root area, and drench
thoroughly again to help soil particles settle close to roots. ~ Leave the trench in place for a few
days and drench daily for at least 4 - 5 days. An added
guarantee of success would be to provide shade for these few
days. I use an old bed linen to just drape over the
plant. This is especially helpful if you're planting during
the warmer days of summer rather than spring. ~ After a few weeks you should see the
plant revive and begin to put out new growth. This is the time
to fertilize with a water soluble booster applied at half strength -
again, really well watered in - not just in the top few inches.
However, if you're planting in the fall you really don't want
vigorous top growth but you do want roots well established and
moist, so water well right through until just before ground freeze
up in December, but don't fertilize until spring.
As you've experienced, correct planting can mean the difference
between life and death for any shrub, let alone a sensitive cut-leaf
maple. For now, don't fertilize, water well, and cross your fingers!
 When winter finally
arrived in mid January we quickly dipped down to normal temperatures
and had good snow cover, and I thought we just may have nipped
disaster in the bud. (excuse the pun I couldn't
resist!). The February thaw we always experience
just plain didn't happen. Instead Mother Nature kept all her
warm thoughts bundled up and concentrated on a late March warming
that, again, lasted much longer than usual, sending the signal to
plants that spring had firmly arrived. Wouldn't it have been
wonderful had this been true!
When winter finally
arrived in mid January we quickly dipped down to normal temperatures
and had good snow cover, and I thought we just may have nipped
disaster in the bud. (excuse the pun I couldn't
resist!). The February thaw we always experience
just plain didn't happen. Instead Mother Nature kept all her
warm thoughts bundled up and concentrated on a late March warming
that, again, lasted much longer than usual, sending the signal to
plants that spring had firmly arrived. Wouldn't it have been
wonderful had this been true! ")

 Developing an eye for
planting design comes step-by-step and grows with your expanding
knowledge of the huge assortment of plants available today. Train
yourself to look at a plant's form (mound, upright, fountaining) and
foliage texture (ferny, fuzzy, bold, strappy), not just its flower
colour. When you get dressed in the morning,
you choose the main item you want to wear and then choose either a
contrasting or matching item to wear with it. Then
perhaps a bit of jewelry in scale with the outfit completes the
picture. In a garden you're using the same sense of matching,
contrasting, decorating, etc. to design individual pictures that
come together to create the whole. Make notes as you go
and think of mistakes as learning opportunities, then move on. There
is no right and wrong to art, and garden design is art. Like
all art, it takes practice, keen observation, and learning more
about your tools - the plants.
Developing an eye for
planting design comes step-by-step and grows with your expanding
knowledge of the huge assortment of plants available today. Train
yourself to look at a plant's form (mound, upright, fountaining) and
foliage texture (ferny, fuzzy, bold, strappy), not just its flower
colour. When you get dressed in the morning,
you choose the main item you want to wear and then choose either a
contrasting or matching item to wear with it. Then
perhaps a bit of jewelry in scale with the outfit completes the
picture. In a garden you're using the same sense of matching,
contrasting, decorating, etc. to design individual pictures that
come together to create the whole. Make notes as you go
and think of mistakes as learning opportunities, then move on. There
is no right and wrong to art, and garden design is art. Like
all art, it takes practice, keen observation, and learning more
about your tools - the plants. Normally sturdy, upright and
tall, this new salmon Echinacea hybrid I was so looking forward to
being really great this year in my 2nd year garden, is flopping near
the ground instead, with many fewer blooms than it would normally
have. Overall, it isn't so much the excess water that's
the main problem, but the inherent lack of sunshine and heat that
comes with lots of rain days that is the double whammy when there's
a summer with just too much rain.
Normally sturdy, upright and
tall, this new salmon Echinacea hybrid I was so looking forward to
being really great this year in my 2nd year garden, is flopping near
the ground instead, with many fewer blooms than it would normally
have. Overall, it isn't so much the excess water that's
the main problem, but the inherent lack of sunshine and heat that
comes with lots of rain days that is the double whammy when there's
a summer with just too much rain. 
 chopped leaves remain in a pile
and are chopped ever finer with each pass.
chopped leaves remain in a pile
and are chopped ever finer with each pass.  Plant life feeds on the
nutrients that result from all of this busy micro-organism
underground activity. Think of the microscopic forms
of animal and insect life that live underground as your much
beloved pets and garden allies that help your garden
thrive. Just toss them this annual meal of chopped leaves and
they will stick around and pay you back handsomely with healthy
plants and plenty of blooms.
Plant life feeds on the
nutrients that result from all of this busy micro-organism
underground activity. Think of the microscopic forms
of animal and insect life that live underground as your much
beloved pets and garden allies that help your garden
thrive. Just toss them this annual meal of chopped leaves and
they will stick around and pay you back handsomely with healthy
plants and plenty of blooms. 
 to cut them to do so. Dunk
them in the water again to moisten and loosen them further.
to cut them to do so. Dunk
them in the water again to moisten and loosen them further.